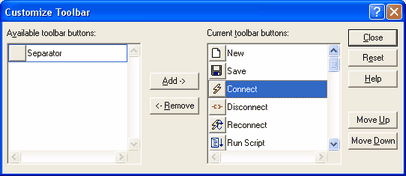
Use the Customize Toolbar dialog box to modify the toolbar to fit your needs.

Step by Step Instructions for Using the Customize Toolbar dialog box
| 1. | To add a button to the toolbar, select a button from the Available toolbar buttons list box and click the Add -> button. |
| 2. | To remove a button from the toolbar, select a button from the Current toolbar buttons list box and click the <- Remove button. |
| 3. | To reposition a button on the toolbar, select a button from the Current toolbar buttons list box and click the Move Up or Move Down button. |
| 4. | To return to the toolbar the state it was in when the dialog box was opened, click the Reset button. |
| 6. | When your changes are complete, click the Close button to save your changes. |
Tips:
Changes to the toolbar affect all sessions not just the current session.
See Also:


